Handmade soap making is both an art and a science. Whether you are a hobbyist or running a small soap business, choosing and using the right soap mold plays a major role in the final look, quality, and consistency of your soap bars.
In this detailed guide, we’ll explain how to use soap molds step by step, the different types of soap molds available, common mistakes to avoid, and expert tips to get professional results every time.
What Is a Soap Mold?
A soap mold is a container used to shape liquid soap batter into solid bars. Once the soap sets and cures, it is removed from the mold and cut into usable pieces.
Soap molds are designed to:
- Hold soap batter safely
- Give uniform shape and size
- Improve finish and surface quality
- Speed up production for soap makers
Types of Soap Molds Used in Handmade Soap Making
1. Silicone Soap Molds
- Flexible and easy to demold
- Ideal for beginners
- No lining required
- Best for melt & pour and cold process soaps
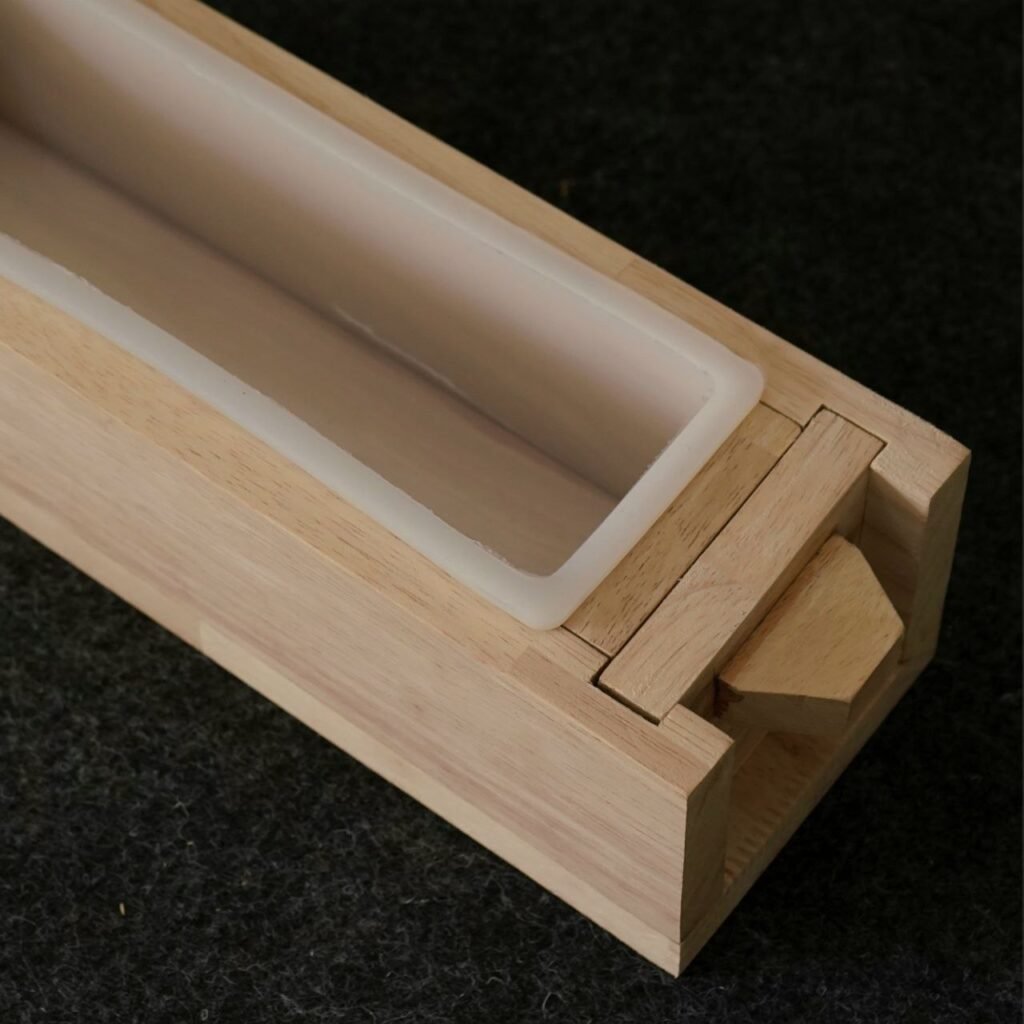
2. Wooden Soap Molds with Silicone Liner
- Strong outer wooden box with food-grade silicone liner
- Gives straight edges and professional finish
- Perfect for bulk production
3. Slab Soap Molds
- Used to make large soap slabs
- Best for cutting multiple bars using a soap cutter
- Common in small soap businesses
4. Individual Cavity Soap Molds
- Each cavity makes one soap bar
- No cutting required
- Best for designer or gift soaps
How to Use a Soap Mold – Step-by-Step Guide
Step 1: Prepare the Soap Mold
- Clean and dry the mold properly
- For wooden molds with silicone liner, ensure the liner is placed flat
- Keep the mold on a level surface
Tip: No oil or paper lining is needed for silicone molds.
Step 2: Prepare Your Soap Batter
- Follow your cold process or melt & pour recipe accurately
- Bring the batter to light or medium trace (for cold process soap)
- Add fragrance, color, or additives at the right stage
Step 3: Pour the Soap into the Mold
- Slowly pour the soap batter into the mold
- Pour from one side to avoid air bubbles
- Fill evenly to get uniform bars
Step 4: Remove Air Bubbles
- Gently tap the mold on the table
- Use a spatula to level the surface
- Avoid over-tapping, which can cause separation
Step 5: Insulation & Setting
- Cover the mold with a lid or cardboard
- Wrap with a towel if using cold process soap
- Allow soap to set for 24–48 hours
Step 6: Demolding the Soap
- Unmold only when soap is firm
- Gently pull silicone liner away from soap
- Do not force the soap out
Step 7: Cutting & Curing
- Use a soap cutter for straight, even bars
- Cure cold process soap for 4–6 weeks
- Store in a cool, dry place
Common Soap Mold Mistakes to Avoid
❌ Demolding too early
❌ Using low-quality silicone molds
❌ Uneven pouring
❌ Overheating soap batter
❌ Not cleaning molds properly
Tips for Getting Professional-Looking Soap Bars
✔ Choose thick, food-grade silicone molds
✔ Use wooden support for slab molds
✔ Keep consistent batch sizes
✔ Clean molds immediately after use
✔ Invest in proper soap-making tools
Why Quality Soap Molds Matter
Using a high-quality soap mold ensures:
- Smooth surface finish
- Sharp edges
- Easy demolding
- Long mold life
- Consistent bar weight
Professional soap makers prefer wooden soap molds with silicone liners because they offer durability, precision, and repeatable results.
Soap Molds for Small Businesses & Bulk Production
If you are planning to scale your soap business, slab molds paired with:
- Soap cutters
- Soap splitters
- Display stands
can significantly improve productivity and branding.
Final Thoughts
Learning how to use soap molds correctly is one of the most important skills in handmade soap making. The right mold not only makes your work easier but also enhances the quality and appearance of your soap.
At Woodfurny, we design soap molds and soap-making tools specifically for Indian soap makers, small brands, and artisans who value quality and consistency.
If you’re serious about soap making, start with the right tools your soap will speak for itself.
